Photo by Battlecreek Coffee Roasters
Cupping is the method that coffee professionals use to taste coffee in its “purest” form. It is also the way that coffee is tasted by Q-graders. These professionals who have gone through intense training and testing to receive their Q-grader Qualification are the people that decide the objective quality of the coffee that determines it’s grading and ultimately, the price it can fetch. Although in a professional setting this process has a strict set of standards and equipment requirements that need to be met, it’s still a fairly accessible way for us at home to assess our coffee. If you’re exploring tasting new coffees and experimenting at home to find what coffee you like, it’s a ‘brew method’ worth exploring!
The essence of cupping is essentially to allow the coffee to steep in water for up to 10 minutes. Coffee is ground very coarsely and placed in the bottom of a cupping bowl (you can use a mug or a small bowl at home). Which ever vessels you choose to use, I recommend a ratio of 200g water to 14g of coffee.
Once the coffee is ground, you can smell it in the bowl, this is the first point of assessment of the coffee. It's known as the 'dry aroma.' I’d suggest buying 3 to 4 different coffees so that you can compare them side-by-side.
Next, you pour hot water over the top of the coffee. If you really want to taste the best of the coffees you spend a lot of your hard-earned money on, I’d recommend buying and boiling bottled, filtered water to ensure consistency across the cups. After boiling the water, wait about a minute before pouring it, you don’t want the water to be at boiling point when you pour it over the coffee. After a minute, pour the water slowly over the coffee, allowing all the grounds to be saturated. You can assess aroma of the wet coffee at this point.
After about 5 minutes of the coffee steeping, you will see a thick crust of coffee forming on the surface of the water (think the crust you get in the initial stages of brewing an AeroPress). This crust will need to be removed. You can use a normal dinner spoon (even better if you have a soup spoon) to remove the crust by scooping under it and transferring it into another bowl. It wont’t be perfect, but you don’t need to worry about that, just remove as much of the grounds at the top as possible.
Now, you should have a bowl/mug of what looks like filter coffee, with a fairly thick layer of grounds on the bottom. Hot tip: Be careful not to dig your spoon in too deep and agitate the coffee still submerged in the water.
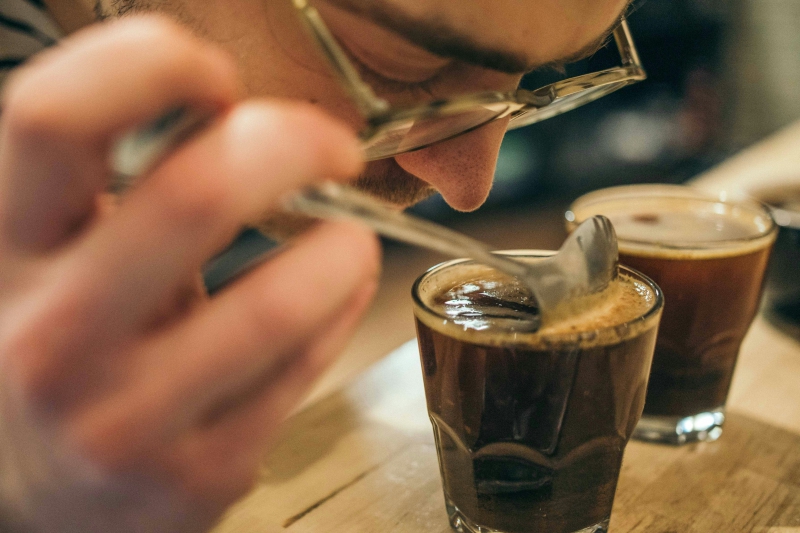
This is where the tasting fun begins! If you are tasting multiple coffees, you may want to have a mug with you that you can spit your coffee out into, over-caffeination is a real thing, but this shouldn’t be a problem at home, just for the pros who taste like 400 coffees a day! Scoop up a spoonful of coffee and swirl it around your mouth to taste it. You may have heard of “slurping”, where coffee professionals simultaneously taste and suck air into their mouths, this can be a pretty loud process to witness. This aerates the coffee inside your mouth, allowing for increased perception of aroma and flavour, but you don’t have to do this to cup effectively at home!
You can taste the coffee over it’s different temperature stages as a fun added layer. High temperatures mask flavour so it’s important to taste the cups again when they are almost room temperature. This can be a really fun experience, particularly when shared with a fellow coffee enthusiast. Grab a friend, ask them to bring their 3 favourite coffees and you bring yours. Brewing all the coffees in the same way means you’re not judging the brewing method, you’re able to judge the flavours.
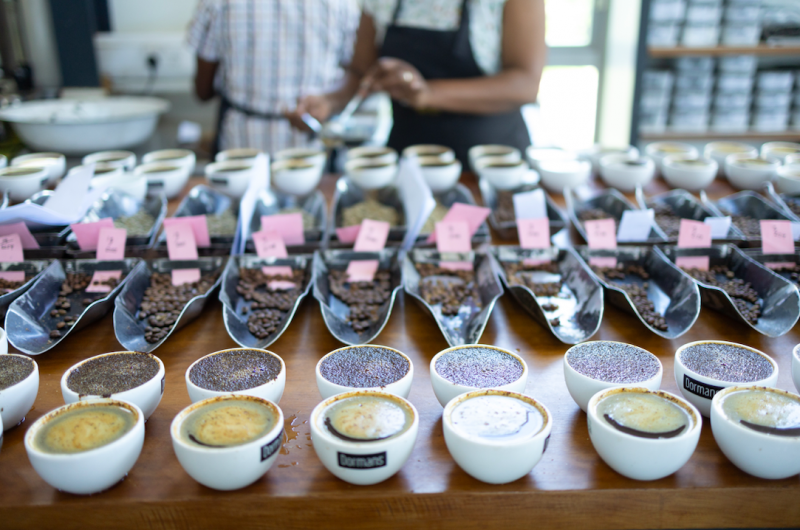
This is how the pros roll! Definitely necessary to spit while tasting a table of coffees that runs from one side of the room to another! Image by Katie Burnett